Recently, I jumped back into security testing for our internal mobile app at work. I needed to set up a testing environment, buy new devices, and root them. I also started rooting my old Pixel 4, but I didn’t take detailed notes, so I’m not prepared to turn that into a proper blog post, maybe next time. This is a quick wrap-up of what I did on the iPhone side.
So here we are, a guide to jailbreaking an iPhone. If you’re new to the term jailbreaking, take a few seconds to check out my other post.
Table of contents
Open Table of contents
Pre-jailbreak
Before we get started, let’s check what I have: an iPhone X running iOS 16.7.2. I chose this device because it strikes a balance, new enough to test modern apps but not too new to tackle the difficulties of jailbreaking. Then, select the appropriate method for jailbreaking at ios.cfw.guide.
For devices like the iPhone X (A11 chip), Palera1n is currently the most reliable jailbreak option. It’s built on the unpatchable checkm8 exploit, so it works consistently across supported iOS versions without depending on new vulnerabilities. In short, if your device is A5 - A11, Palera1n is the go to.
Jailbreak with Palera1n
- palera1n
- MacOS
- iPhone X, version 16.7.2
- Must use USB-A to Lightning cable due to compatibility issues when entering DFU mode.
Step 1. Remove Passcode in iPhone. Connect iPhone to Mac with a cable, then Click “Trust” this computer.
Step 2: Install palera1n tool
sudo /bin/sh -c "$(curl -fsSL https://static.palera.in/scripts/install.sh)"Step 3: Run palera1n on command line
update: palera1n -l
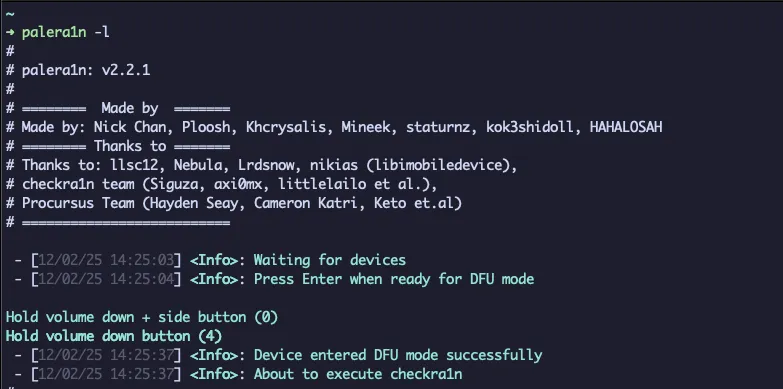
Step 4: Enter and follow the instruction
- Hold volumn down + side button for 4 seconds
- Release the side button, keep hold volumn down for 10 seconds
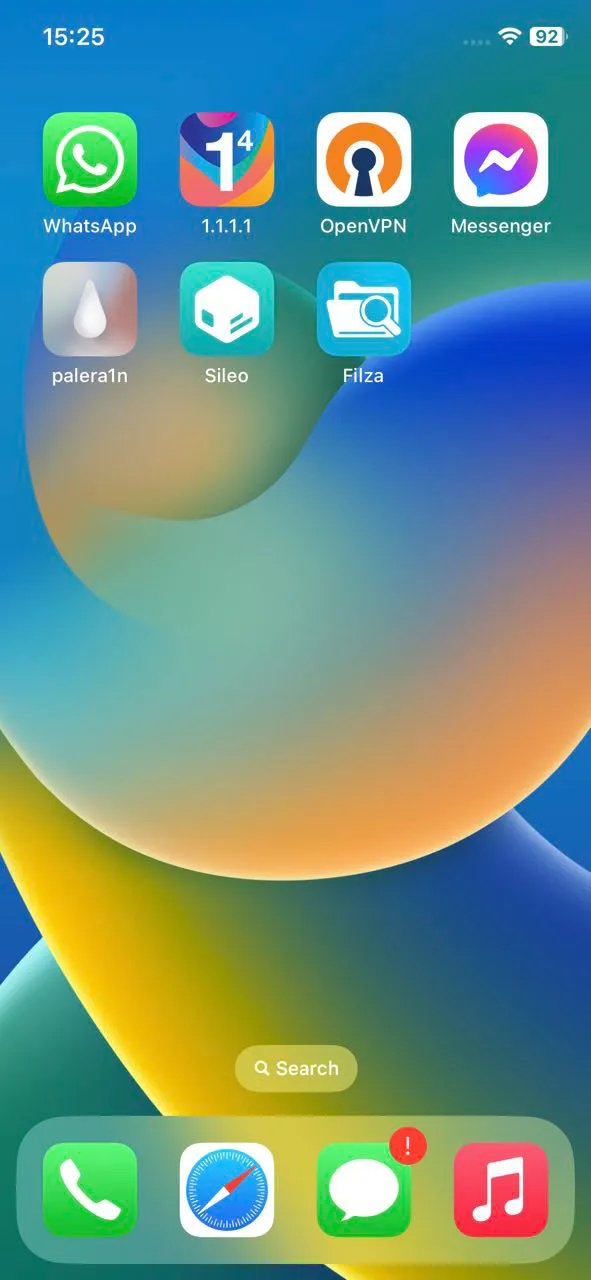
Once complete, this will install palera1n and sileo app on the device.
Troubleshooting
The first issue I encountered was that SSH to iPhone on port 22 didn’t work due to changes in Palera1n, so I had to use an alternative method. (src: Q&A on palera1n.in)
password: root/mobile is alpine
ssh root@127.0.0.1 -o “StrictHostKeyChecking=no” -o “UserKnownHostsFile=/dev/null” -o “ProxyCommand=inetcat 44”
If you cannot use sudo, edit the file ssh_config
find / -name sshd_config -print
use vim to edit <sshconfig>
PasswordAuthentication yes
--------------------
then with sudo
find / -name sudo -print
Create a profile in ./
vim .profile
export PATH="/private/preboot/[digit_string]/jb-xxxxxx/procursus/usr/bin:$PATH"
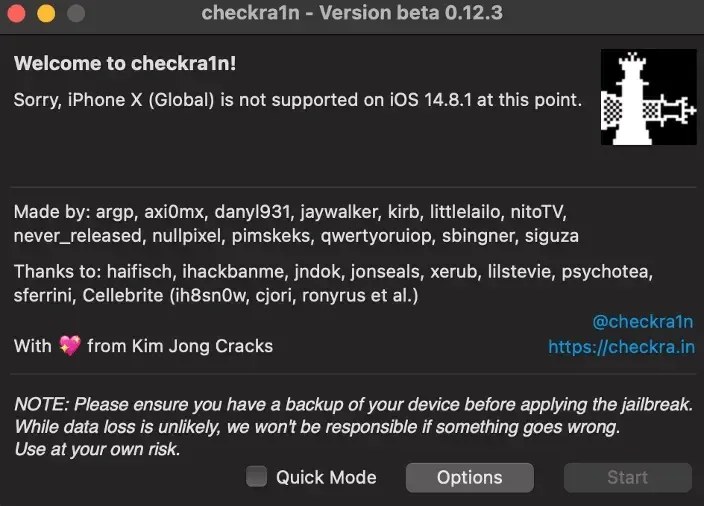
source .profileRevised version of the old method: Checkra1n
- Checkra1n: 0.12.3 version
- MacOS
- iPhone X, version 14.8.1
- USB-A cable
Step 1. Remove the passcode on your iPhone. Connect iPhone to Mac with a cable, then click “Trust” this computer.
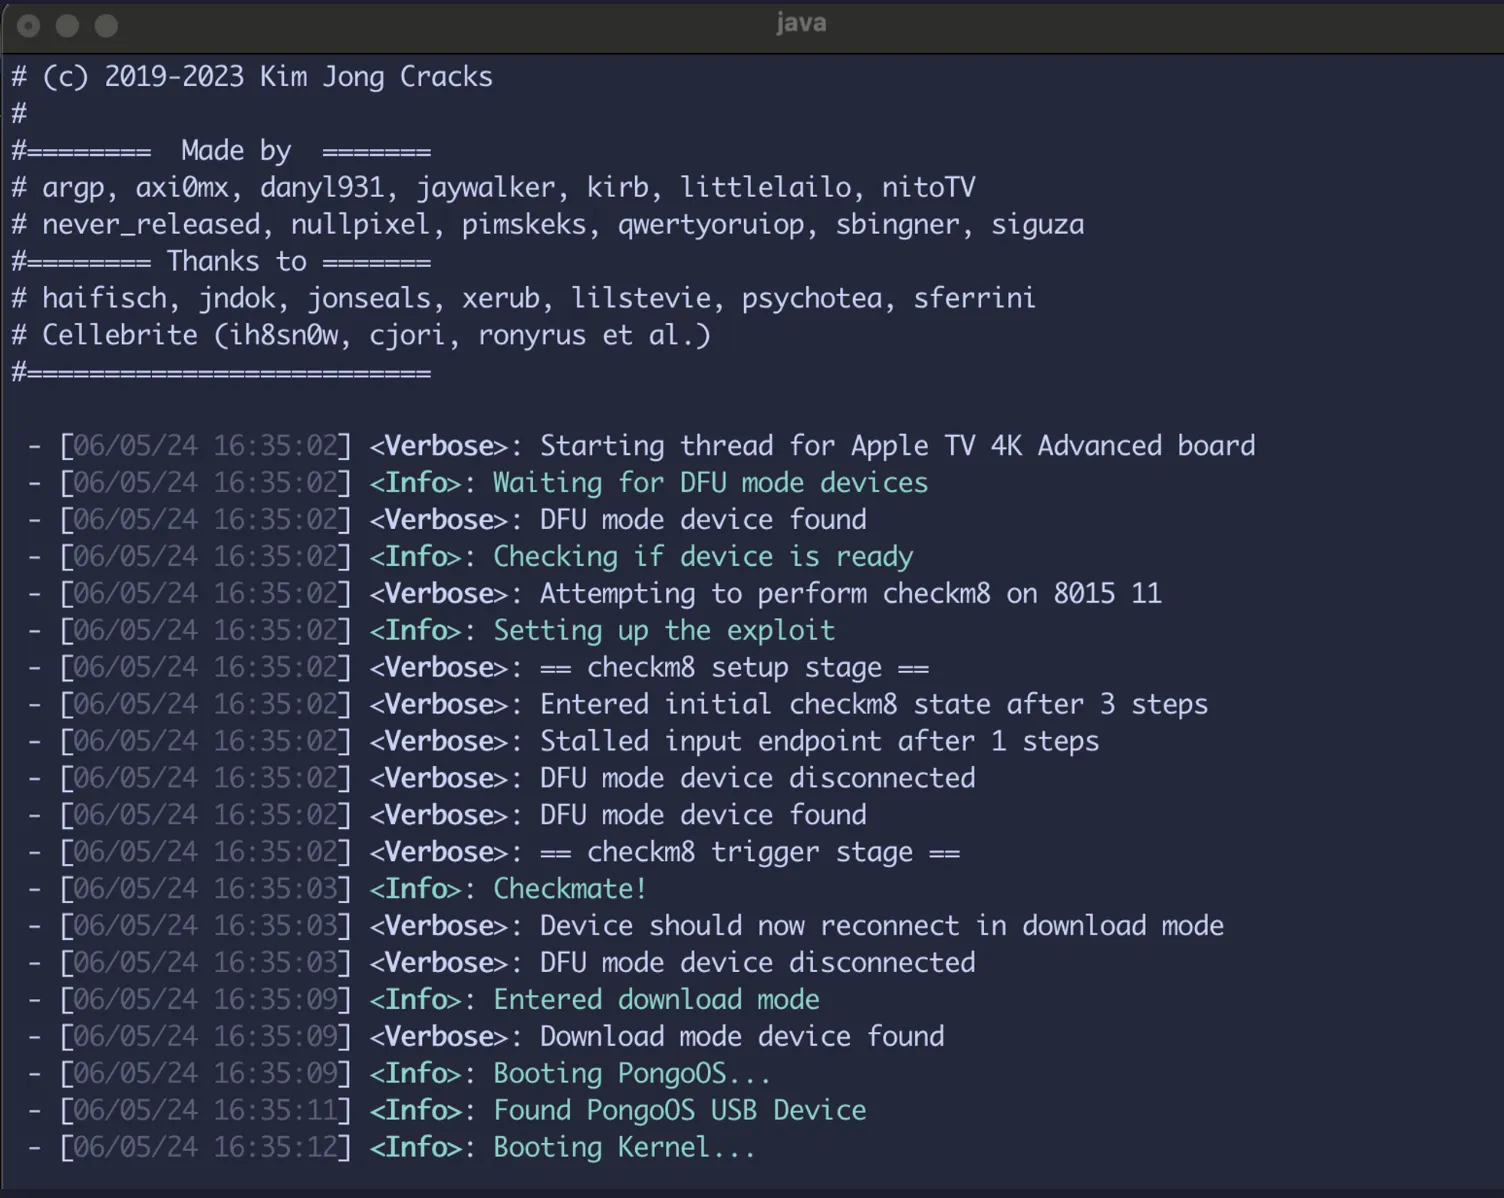
Step 2. Install Checkra1n tools on your Mac. In version 0.12.3, refer to the notes.
A11 devices on iOS 14.0 and above require removing the passcode and enabling “Skip A11 BPR check” in the options. This is not recommended, but it’s there.
Step 3. Open Checkra1n tool, then configure with options
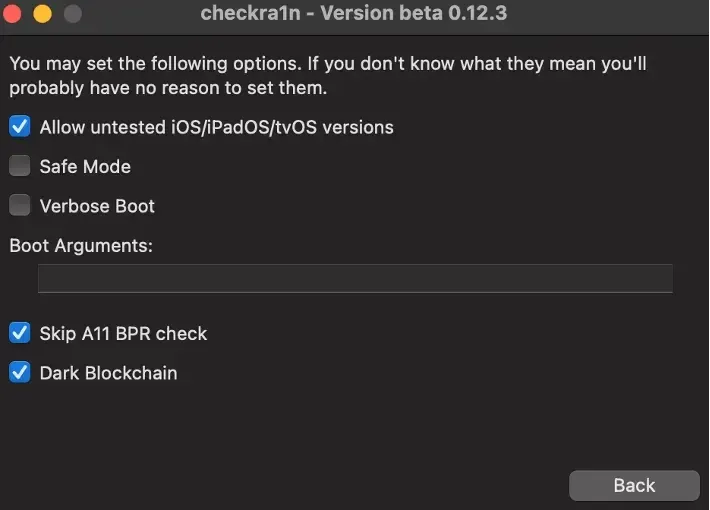
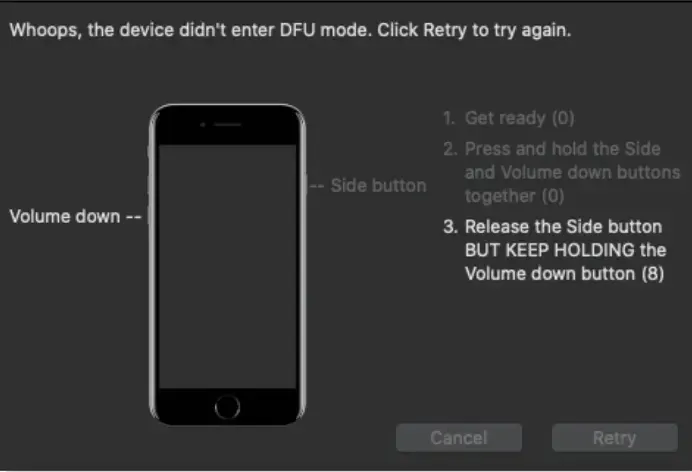
Step 4. Enter DFU mode, then follow the instructions on screen
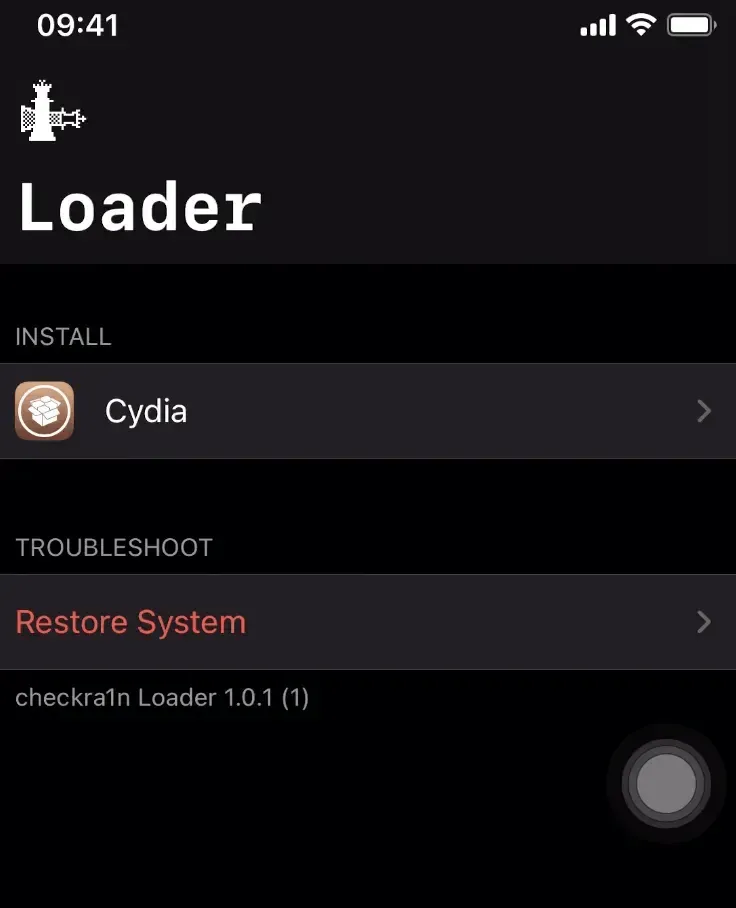
Step 5. Once booted, you will have the Checkra1n application installed on your iPhone. This means we jailbroke successfully. Finally, we can install Cydia inside the Checkra1n app.